Gouache Plein Air Painting Setup
Ever since I started plein air painting in my last few years of art school I’ve been slowly refining and optimizing my painting kit for maximum portability and use! I’ve spent a truly silly amount of time searching for just the perfect products to complete my kit so I thought it would be worth documenting for anyone interested in a similar setup.
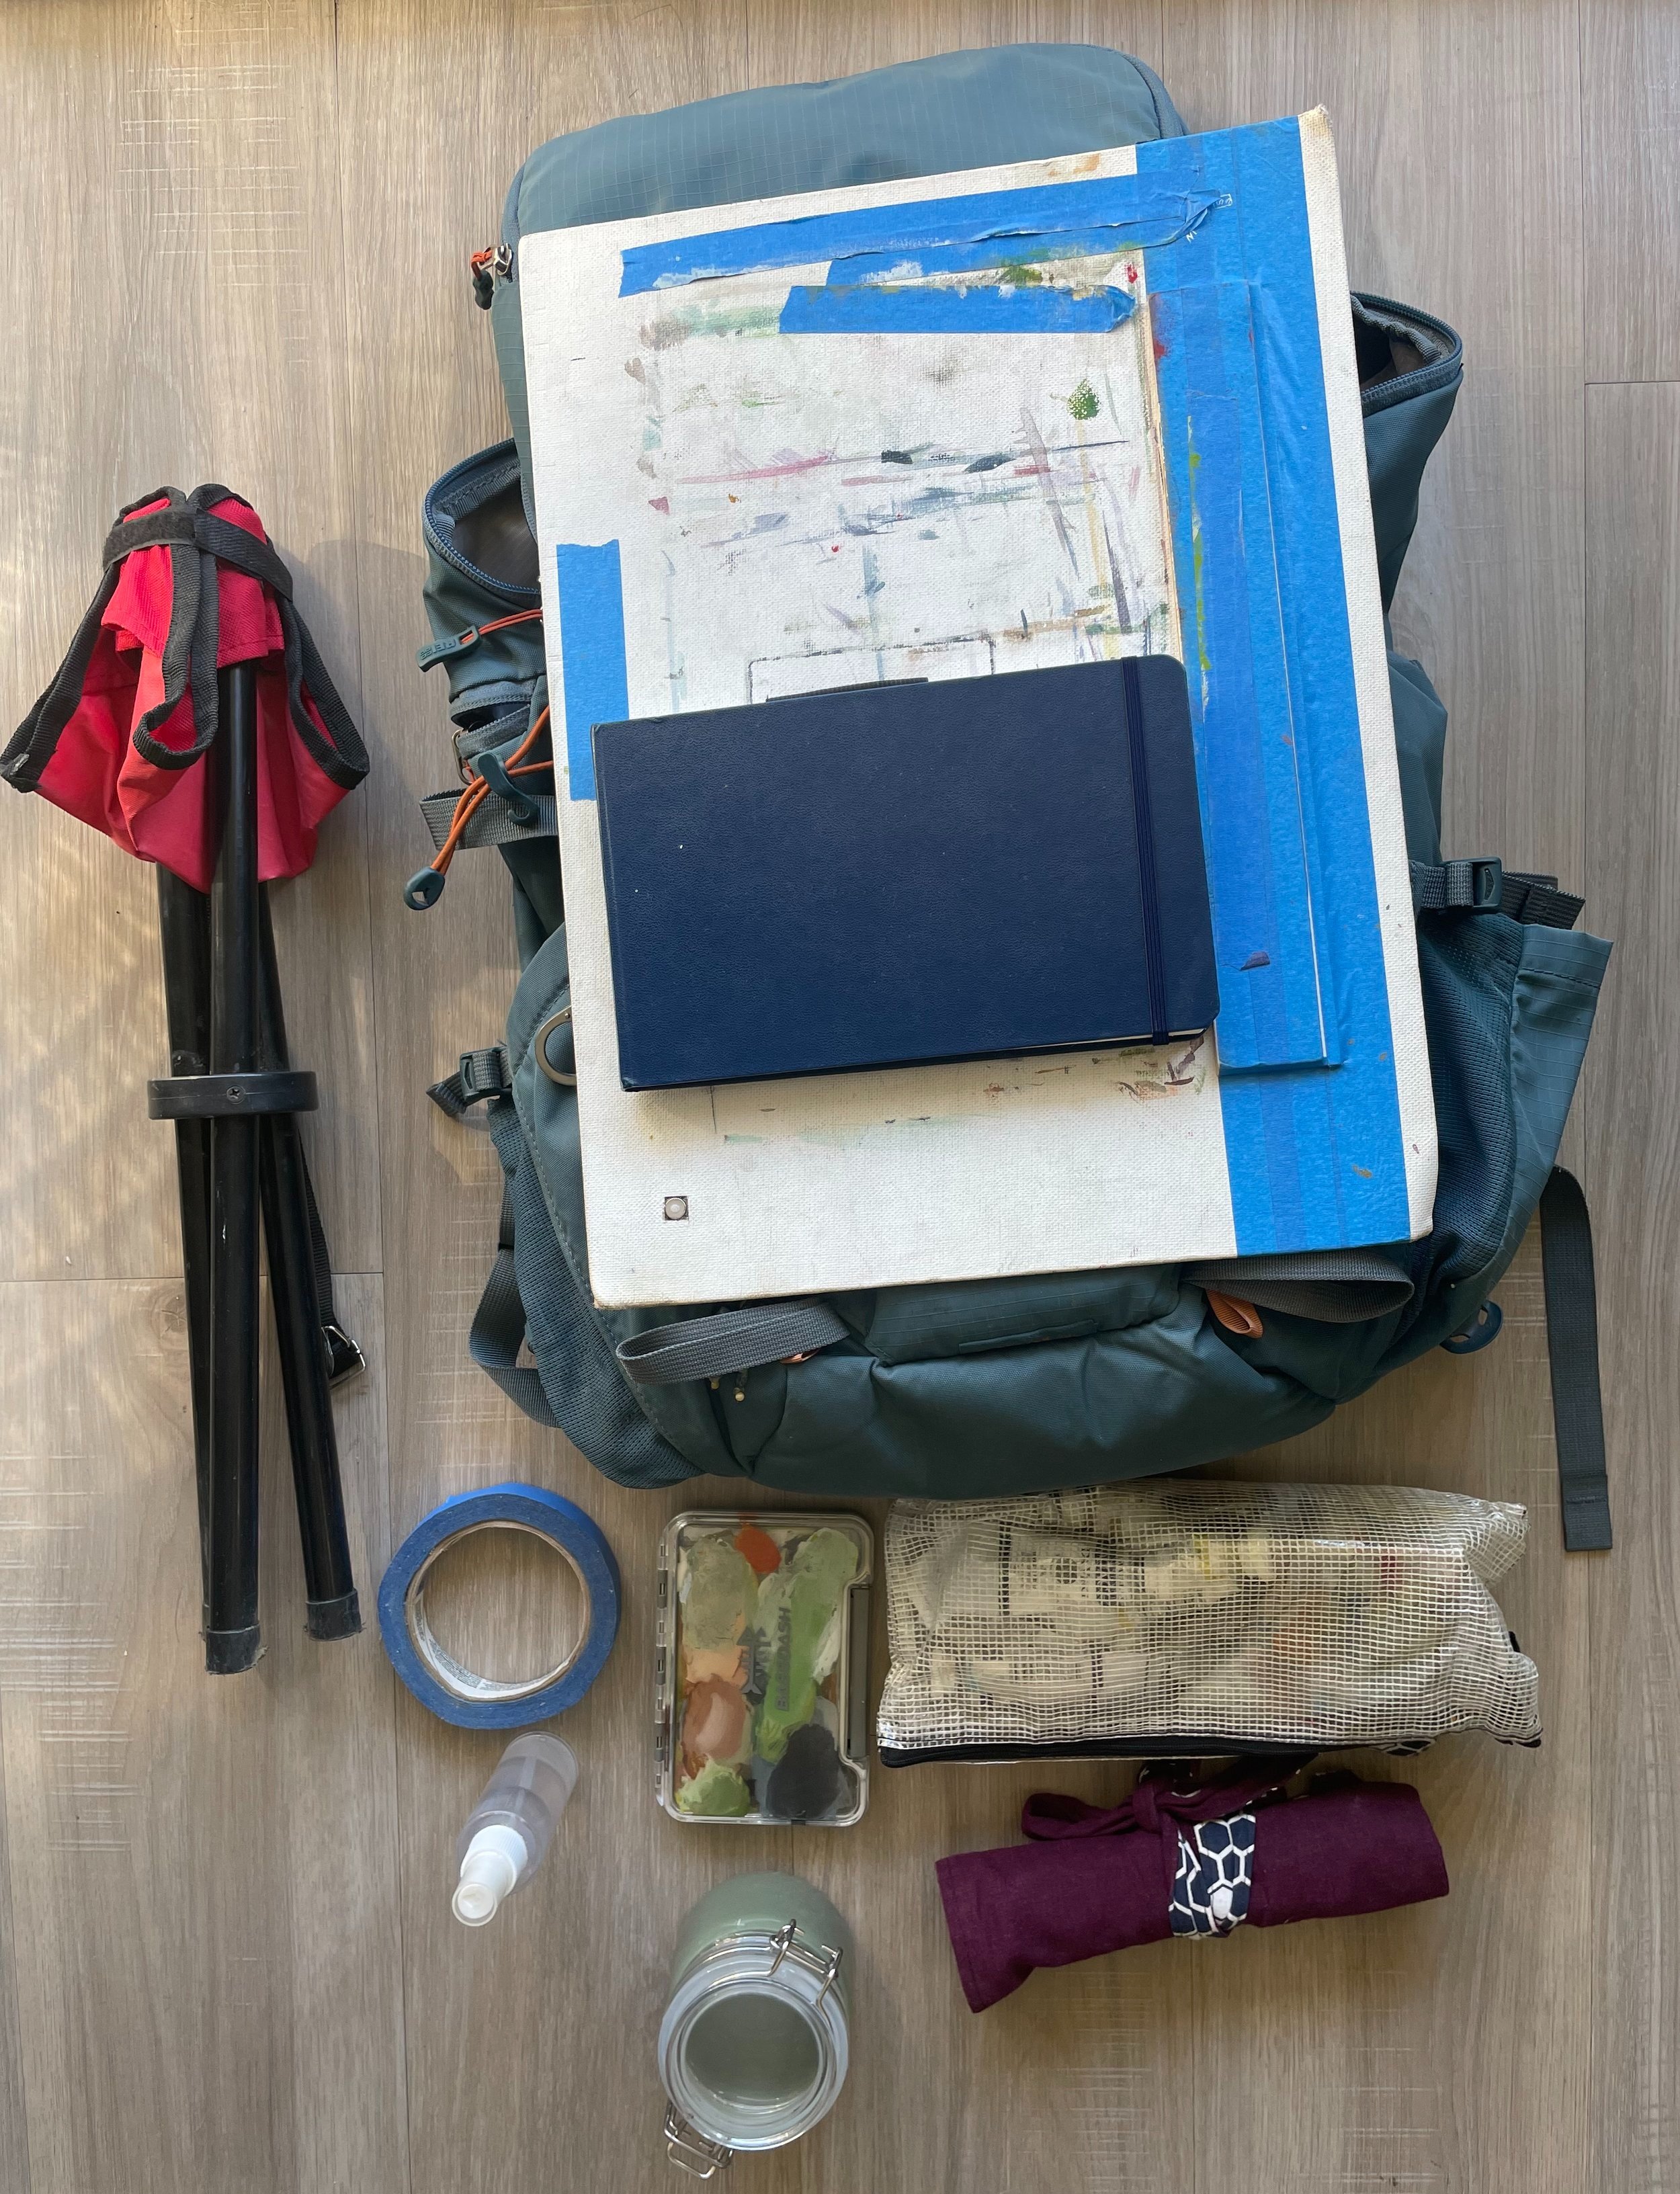
My full kit laid out

Setup in action at Pinnacles National Park.
Here’s an overview shot of everything I carry with me on a given painting day. Some things are pretty self-explanatory while some I will elaborate on a bit more.
In general though, this setup is a sitting setup. Unlike some (probably more ergonomic) options that involve using a camera tripod to make a standing easel I opted for a sitting setup. Someday I will try the standing setup as well but for now here’s what I have:

Backpack
I hike a decent amount and therefore my entire kit is built around maximum portability and compatibility with one of my favorite pieces of kit ever- my hiking and climbing pack.
The backpack I’m using is the REI Co-op Rucksack 28L. My version is the older model of what they’re currently selling on the website but the basic functions are the same. It’s truly the best backpack I’ve ever used or bought- so much so that I’ve converted all my friends and climbing buddies to buying it as well. Highly recommend.
When it comes to painting though, the main and most important feature is that the main pocket of the backpack is large and wide, basically a bucket and not vertically flat and thin more like a school backpack. This allows me to fit most of the painting kit in flat and prevent spills and leaks.

Palette
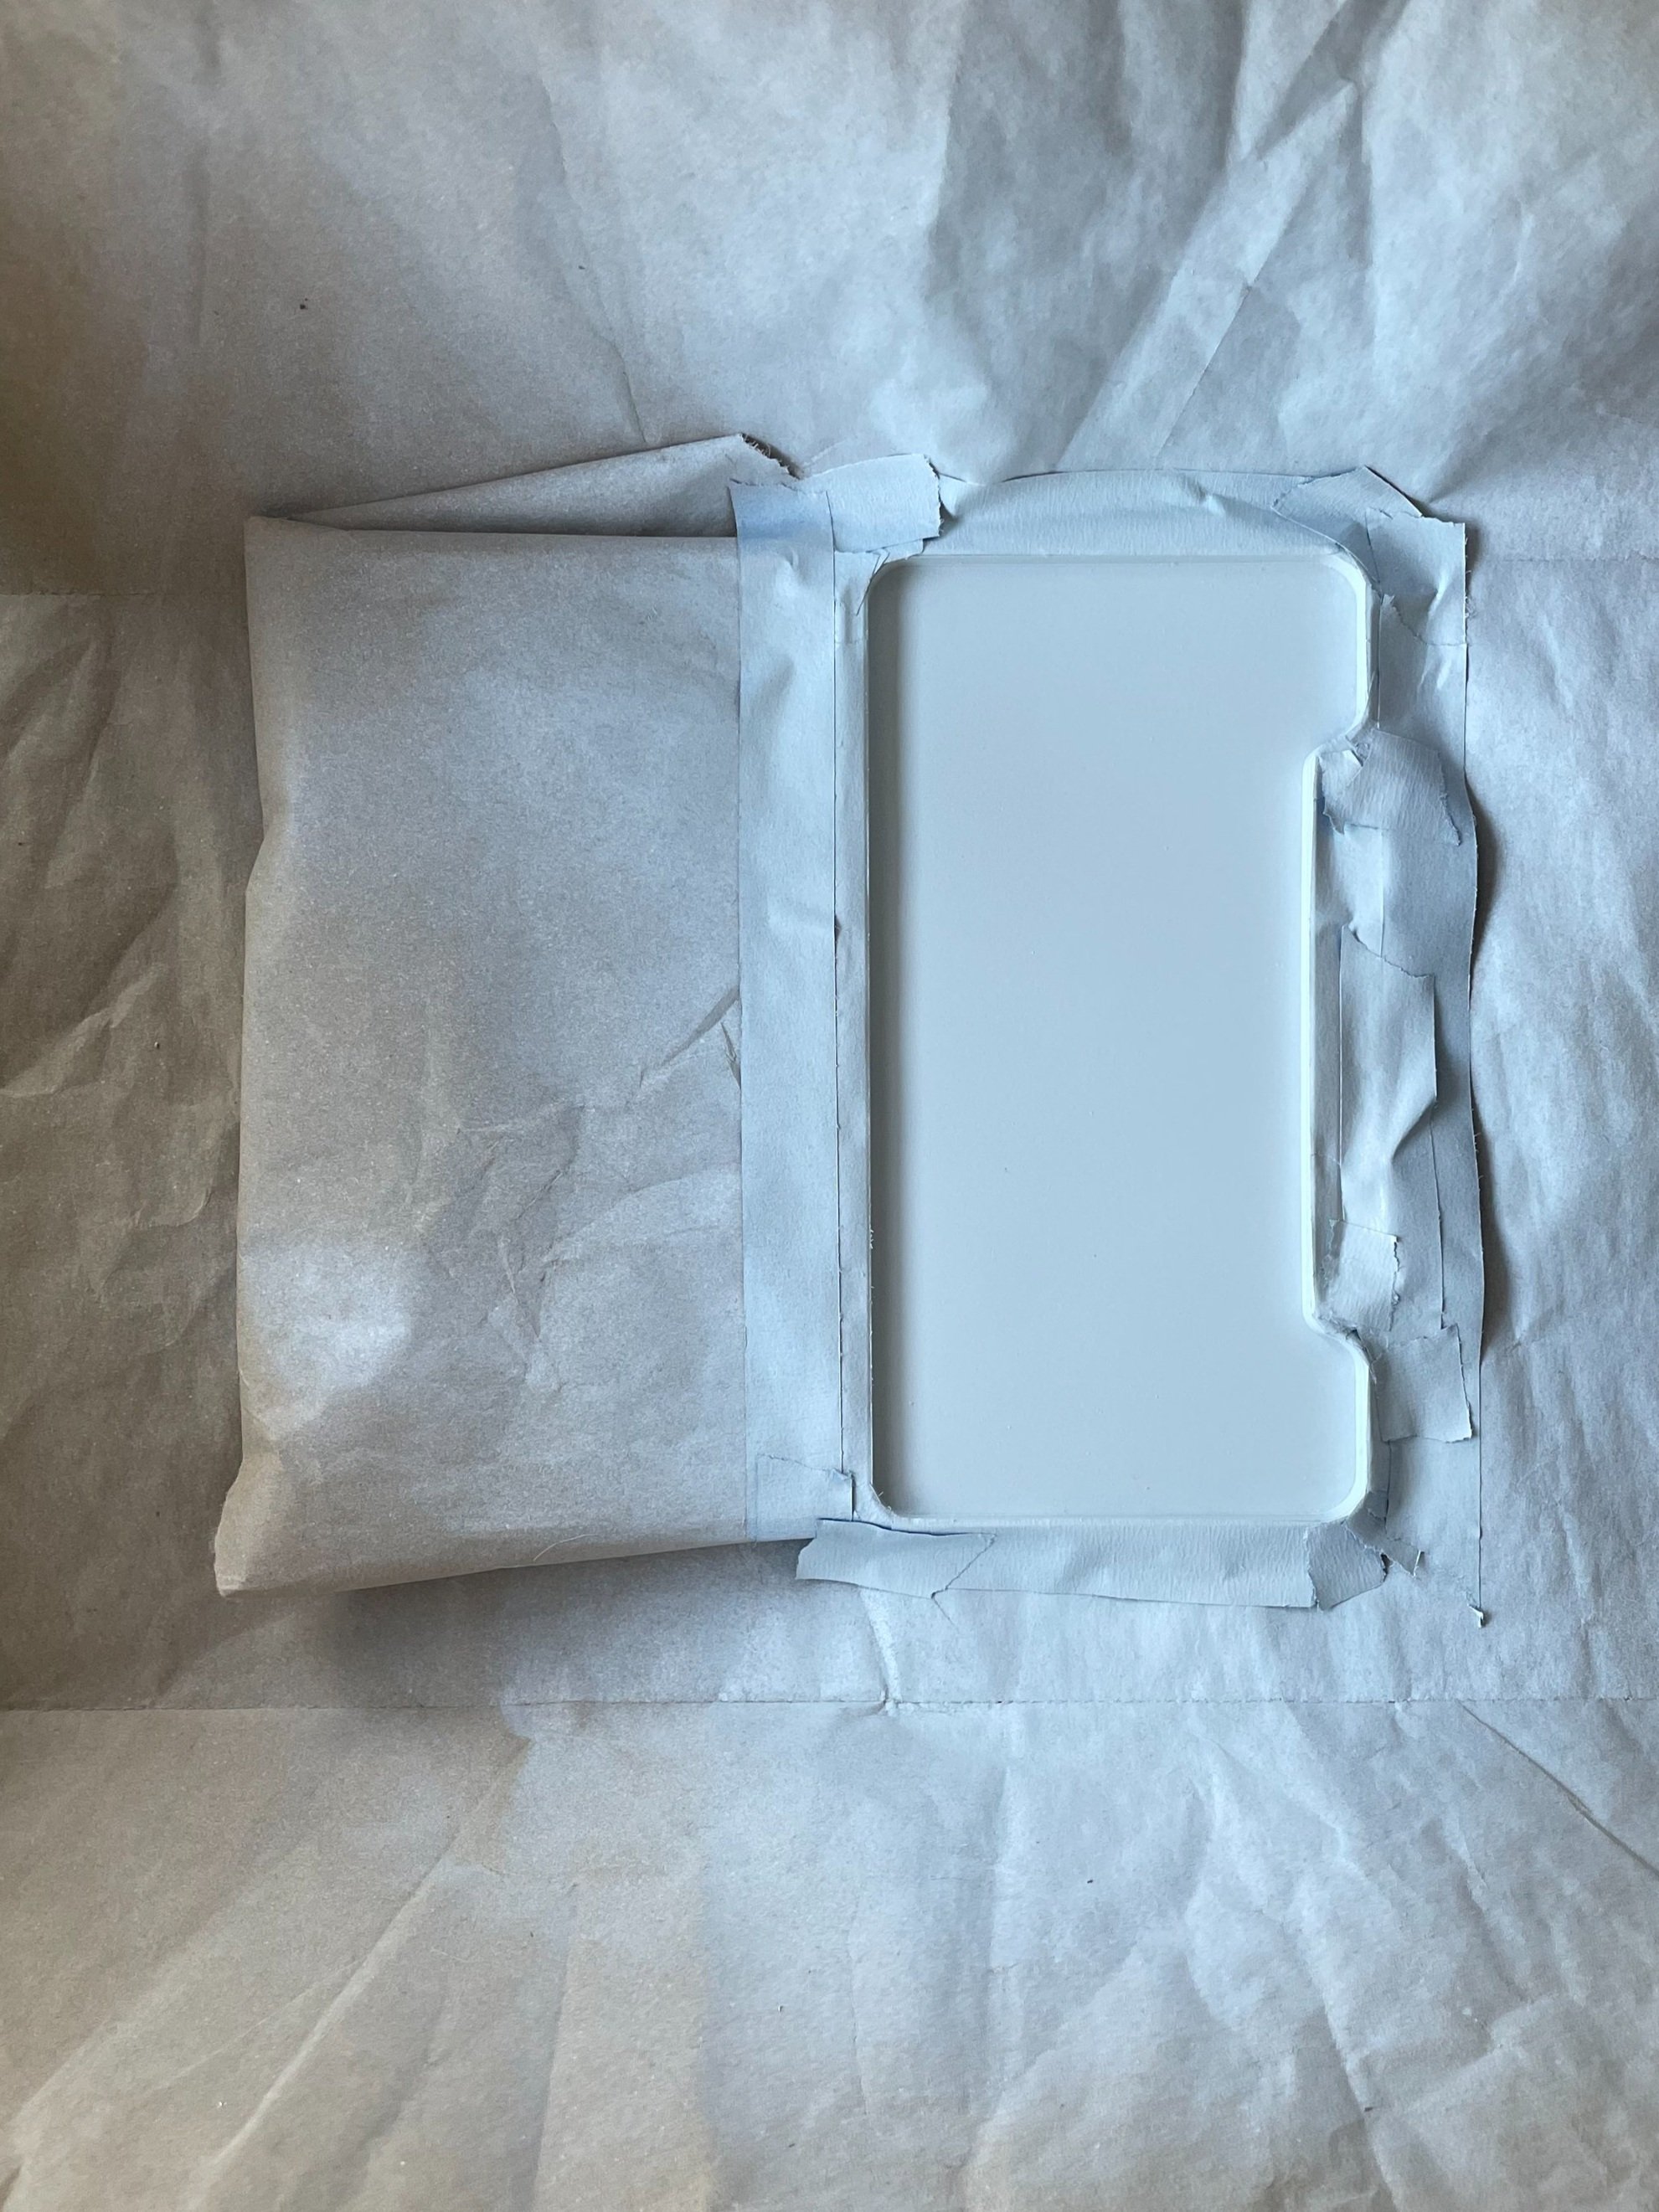
The star of the show and the main reason I even wanted to make this write up in the first place. At the very beginning I was using an enormous bulky Masterson Sta-Wet palette the size of a small encyclopedia, but then I quickly realized that for tiny gouache paintings like I was doing there was no reason to have such a massive palette. I swapped out for an old pencil tin with the lid spray painted white as a palette surface. This worked for a while until I noticed that the metal was starting to rust from being damp constantly - and thus began my search.
I wanted a thin plastic box with (ideally) a watertight lid so I didn’t have to worry about paint leaking out the sides if my backpack wasn’t stored perfectly vertical. I like to keep a single palette going for a few sessions if I can to save any paint I didn’t completely use up. The palette sponge on the bottom layer is kept damp to keep the paint from drying out, both when its stored as well as onsite.
Unfortunately, finding this elusive perfect palette proved much harder than I had originally anticipated. I started by looking for actual gouache and watercolor palettes but they were all either not watertight or much too large for my needs.
These were a few of the options I considered but ultimately didn’t go with for one reason or another.
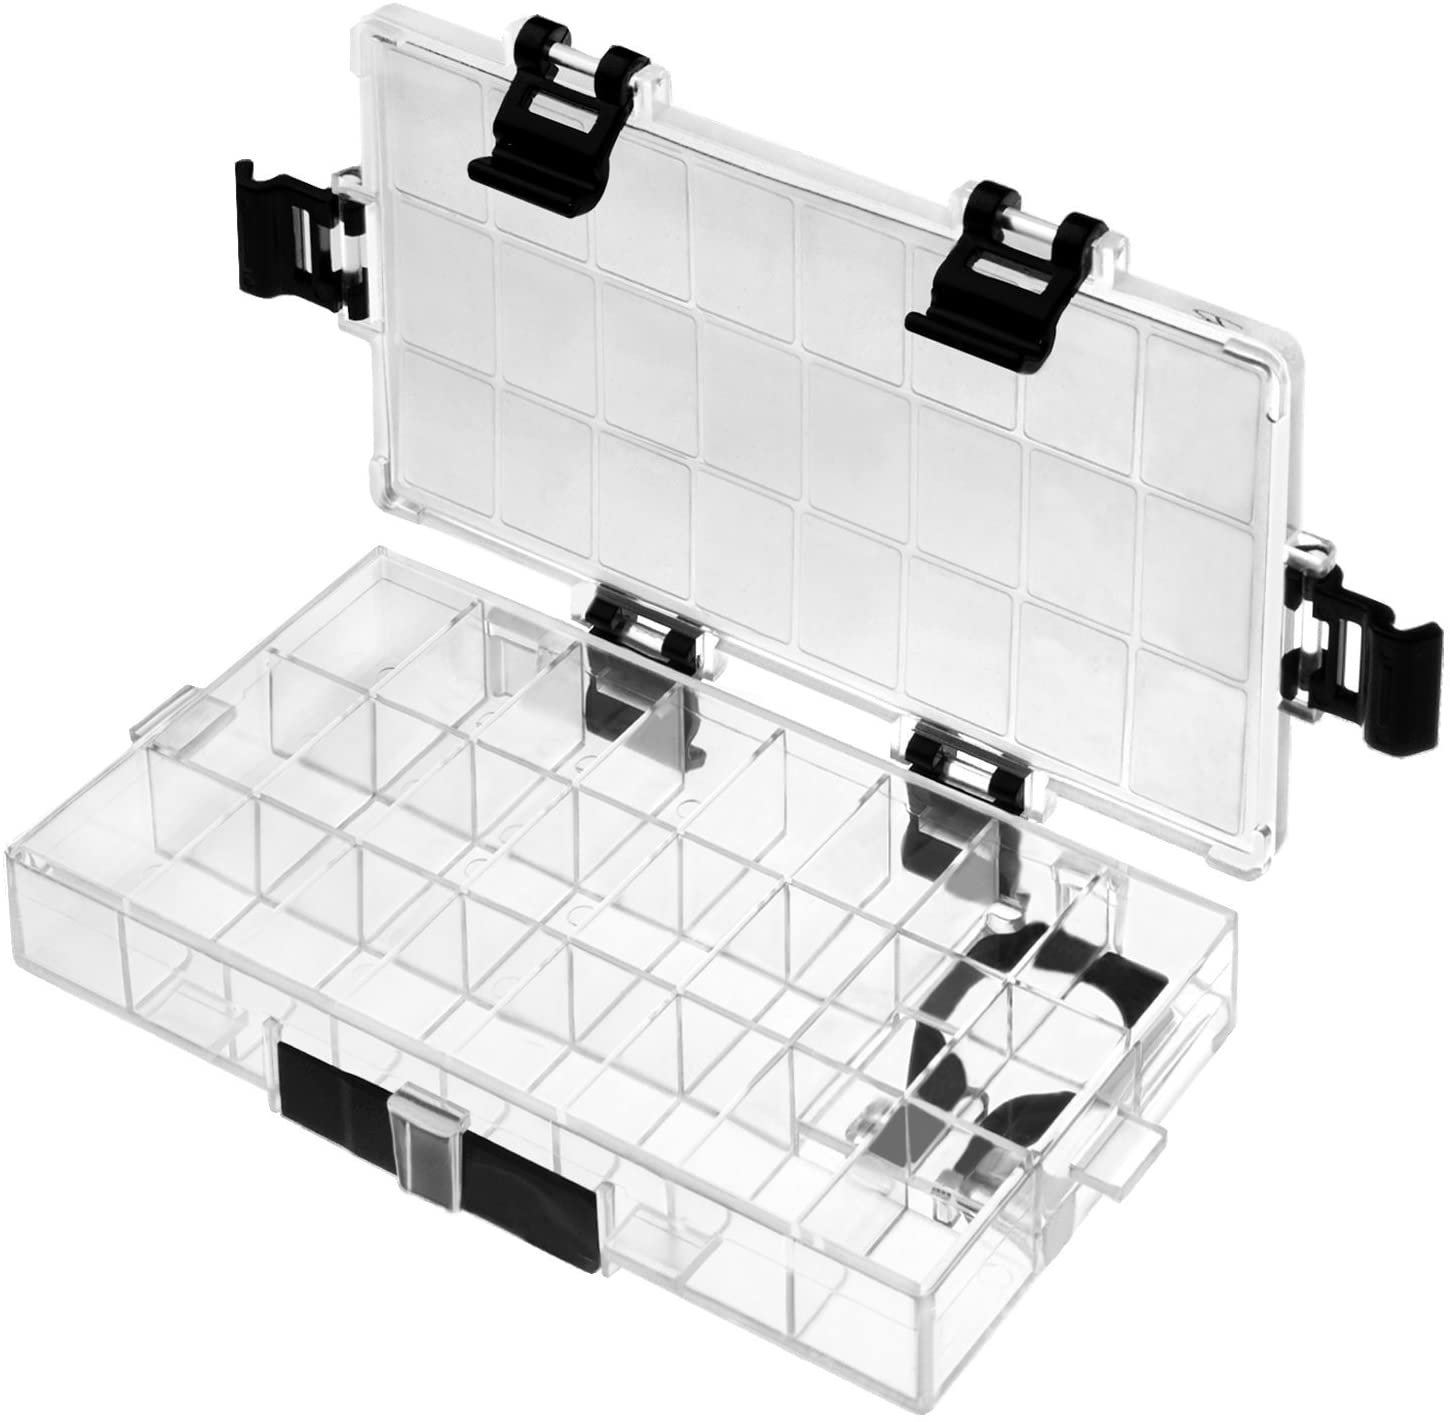
I started expanding my search to tupperware, food storage containers, pencil cases, phone boxes - anything I could think of. Then one day (after a few months of searching) I was casually searching for random thin plastic case keywords as I always did in my spare time, and I stumbled upon the perfect thing.
This. A flat plastic case for fishing flies. It was everything I needed - the perfect size and shape, super flat for great portability, has a latching lid with a seal around the edge to keep water in (or out) and it was sturdy. I immediately bought 5 in two different sizes. I simply ripped out the silicone pad on the bottom (held in with double stick tape) and cut my sponge to fit. The lid is perfect for a mixing palette and the palette side is just deep enough for a sponge, palette paper and any globs of paint.
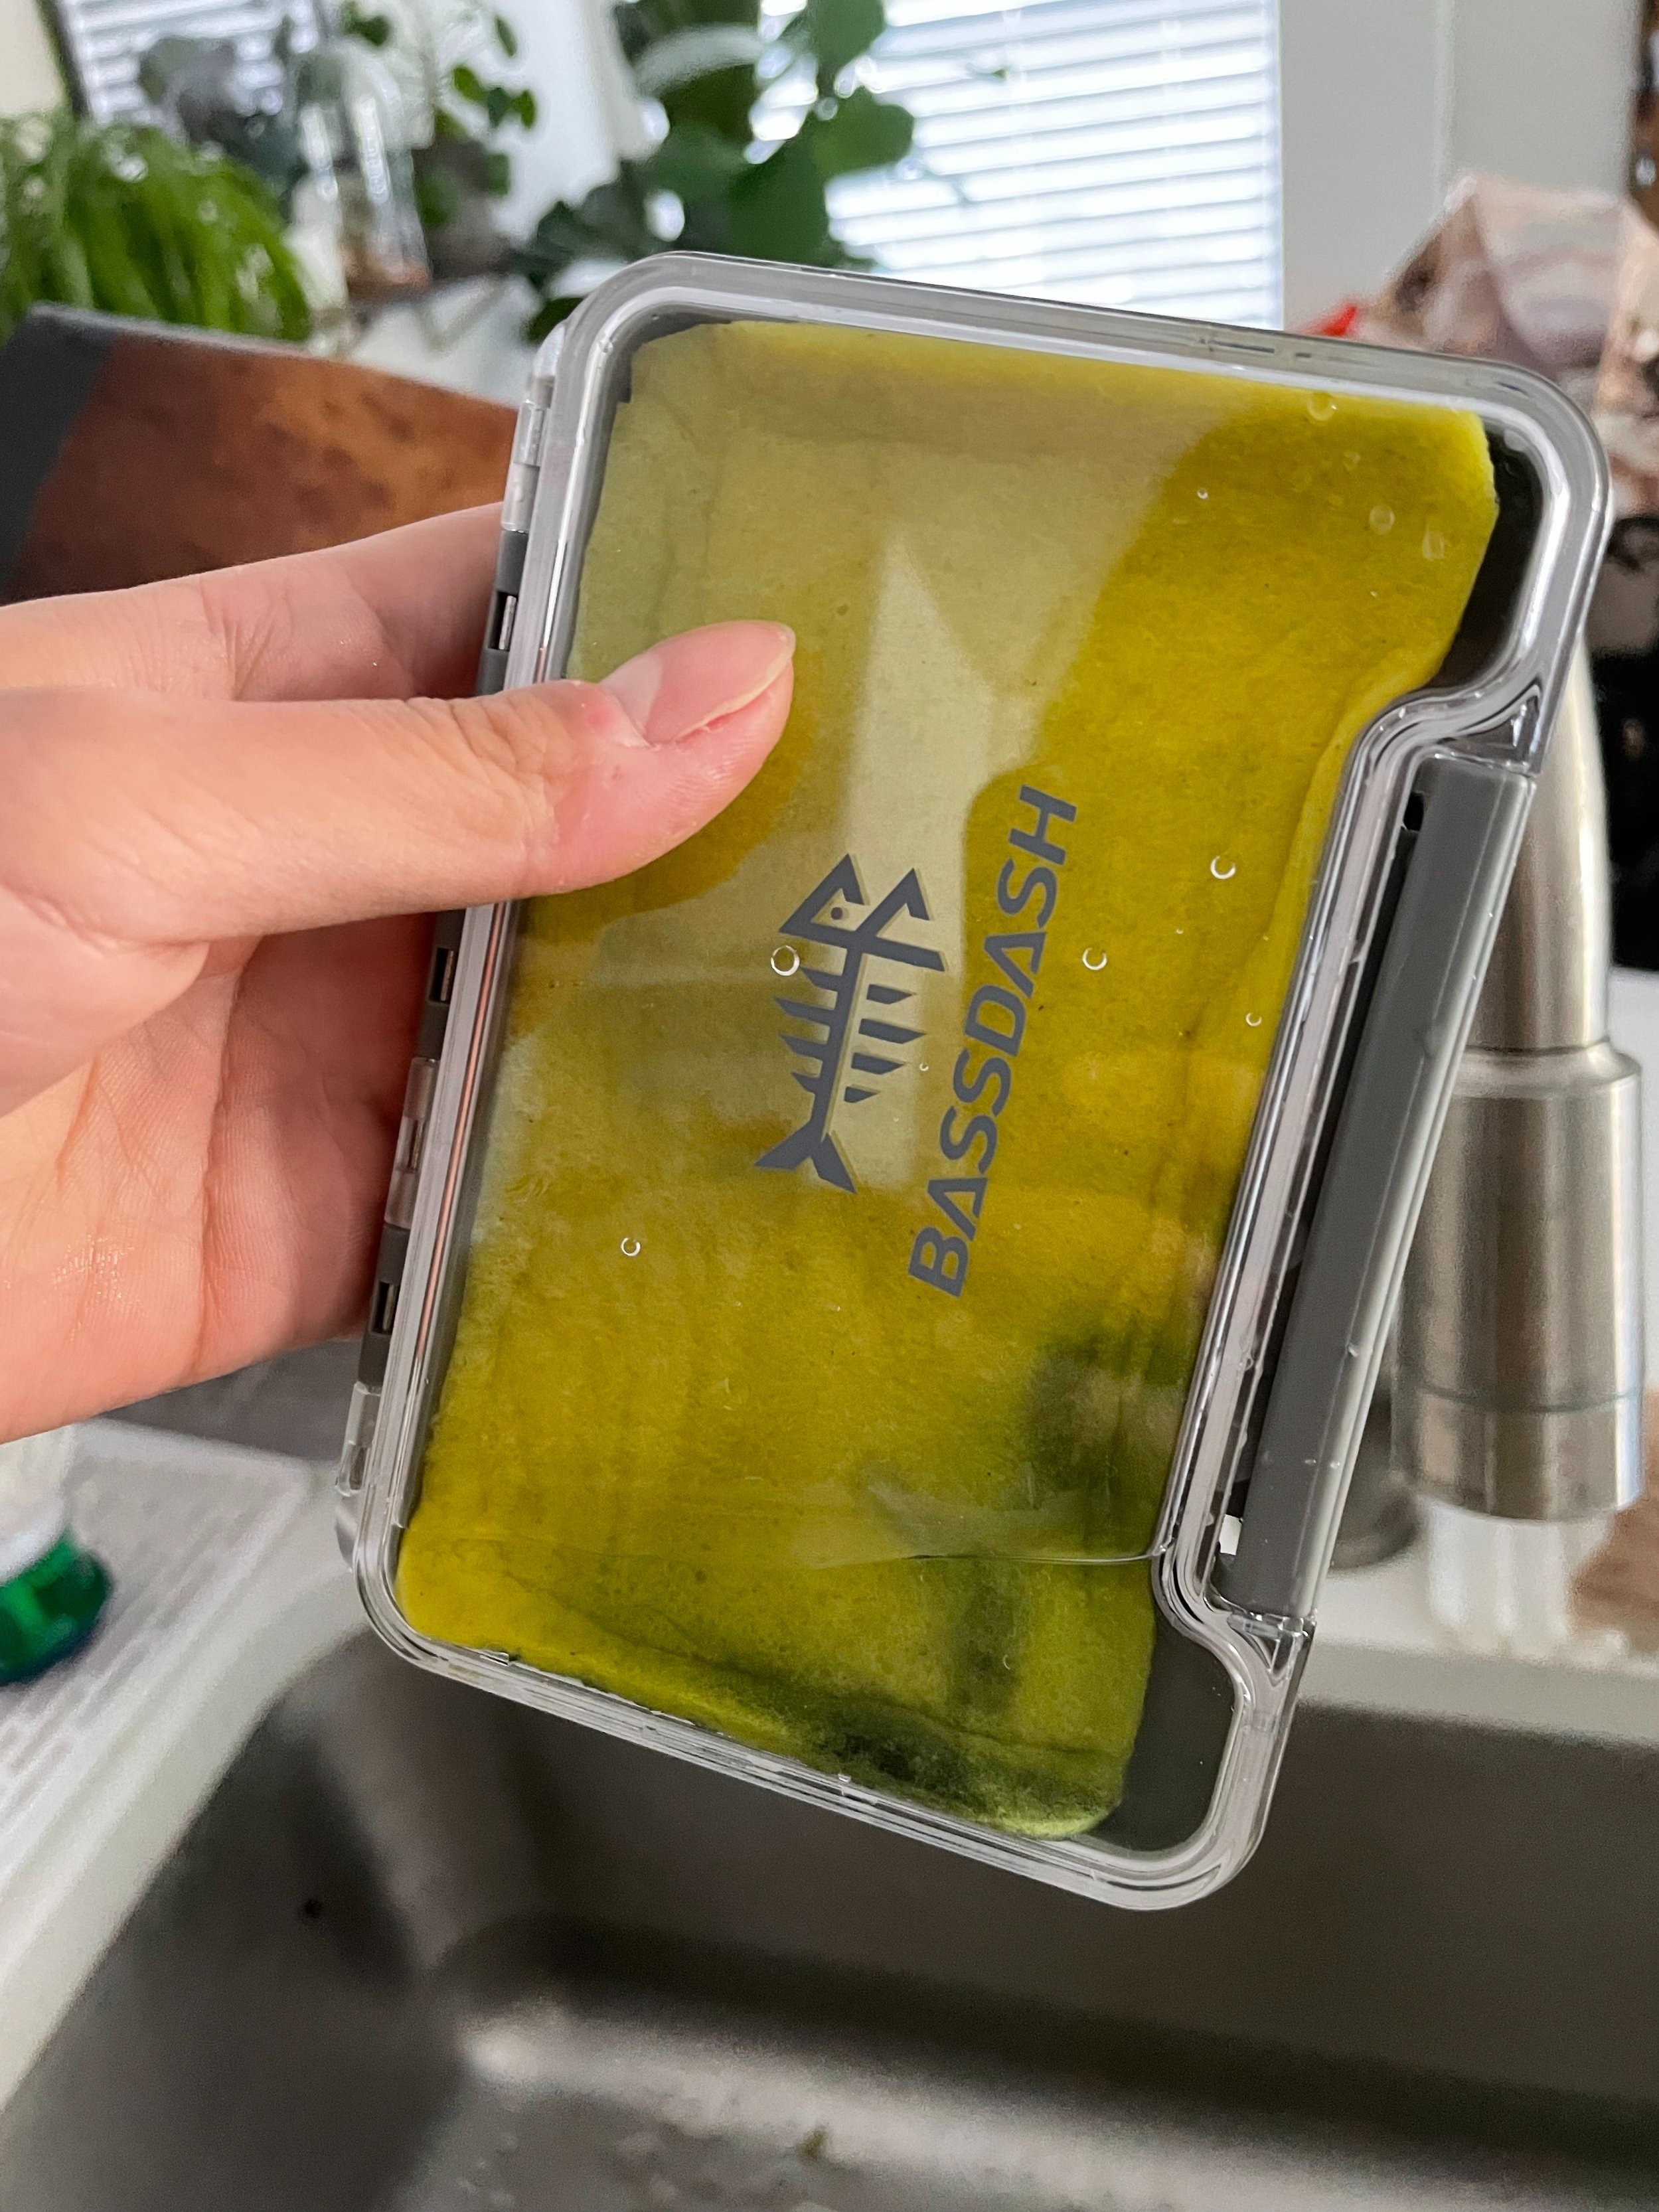
I spray painted the lid of one of them white to see if I wanted a white palette surface but after taking the un-painted one for a few test runs I realized I didn’t mind the water and paint beading as much as I thought I would and the clear lid is helpful for seeing at a glance what’s inside.

What it looks like open, no palette paper. If I know I won’t be painting for a while I’ll clean the whole thing, toss the paper and let it dry out to prevent mold and mildew.
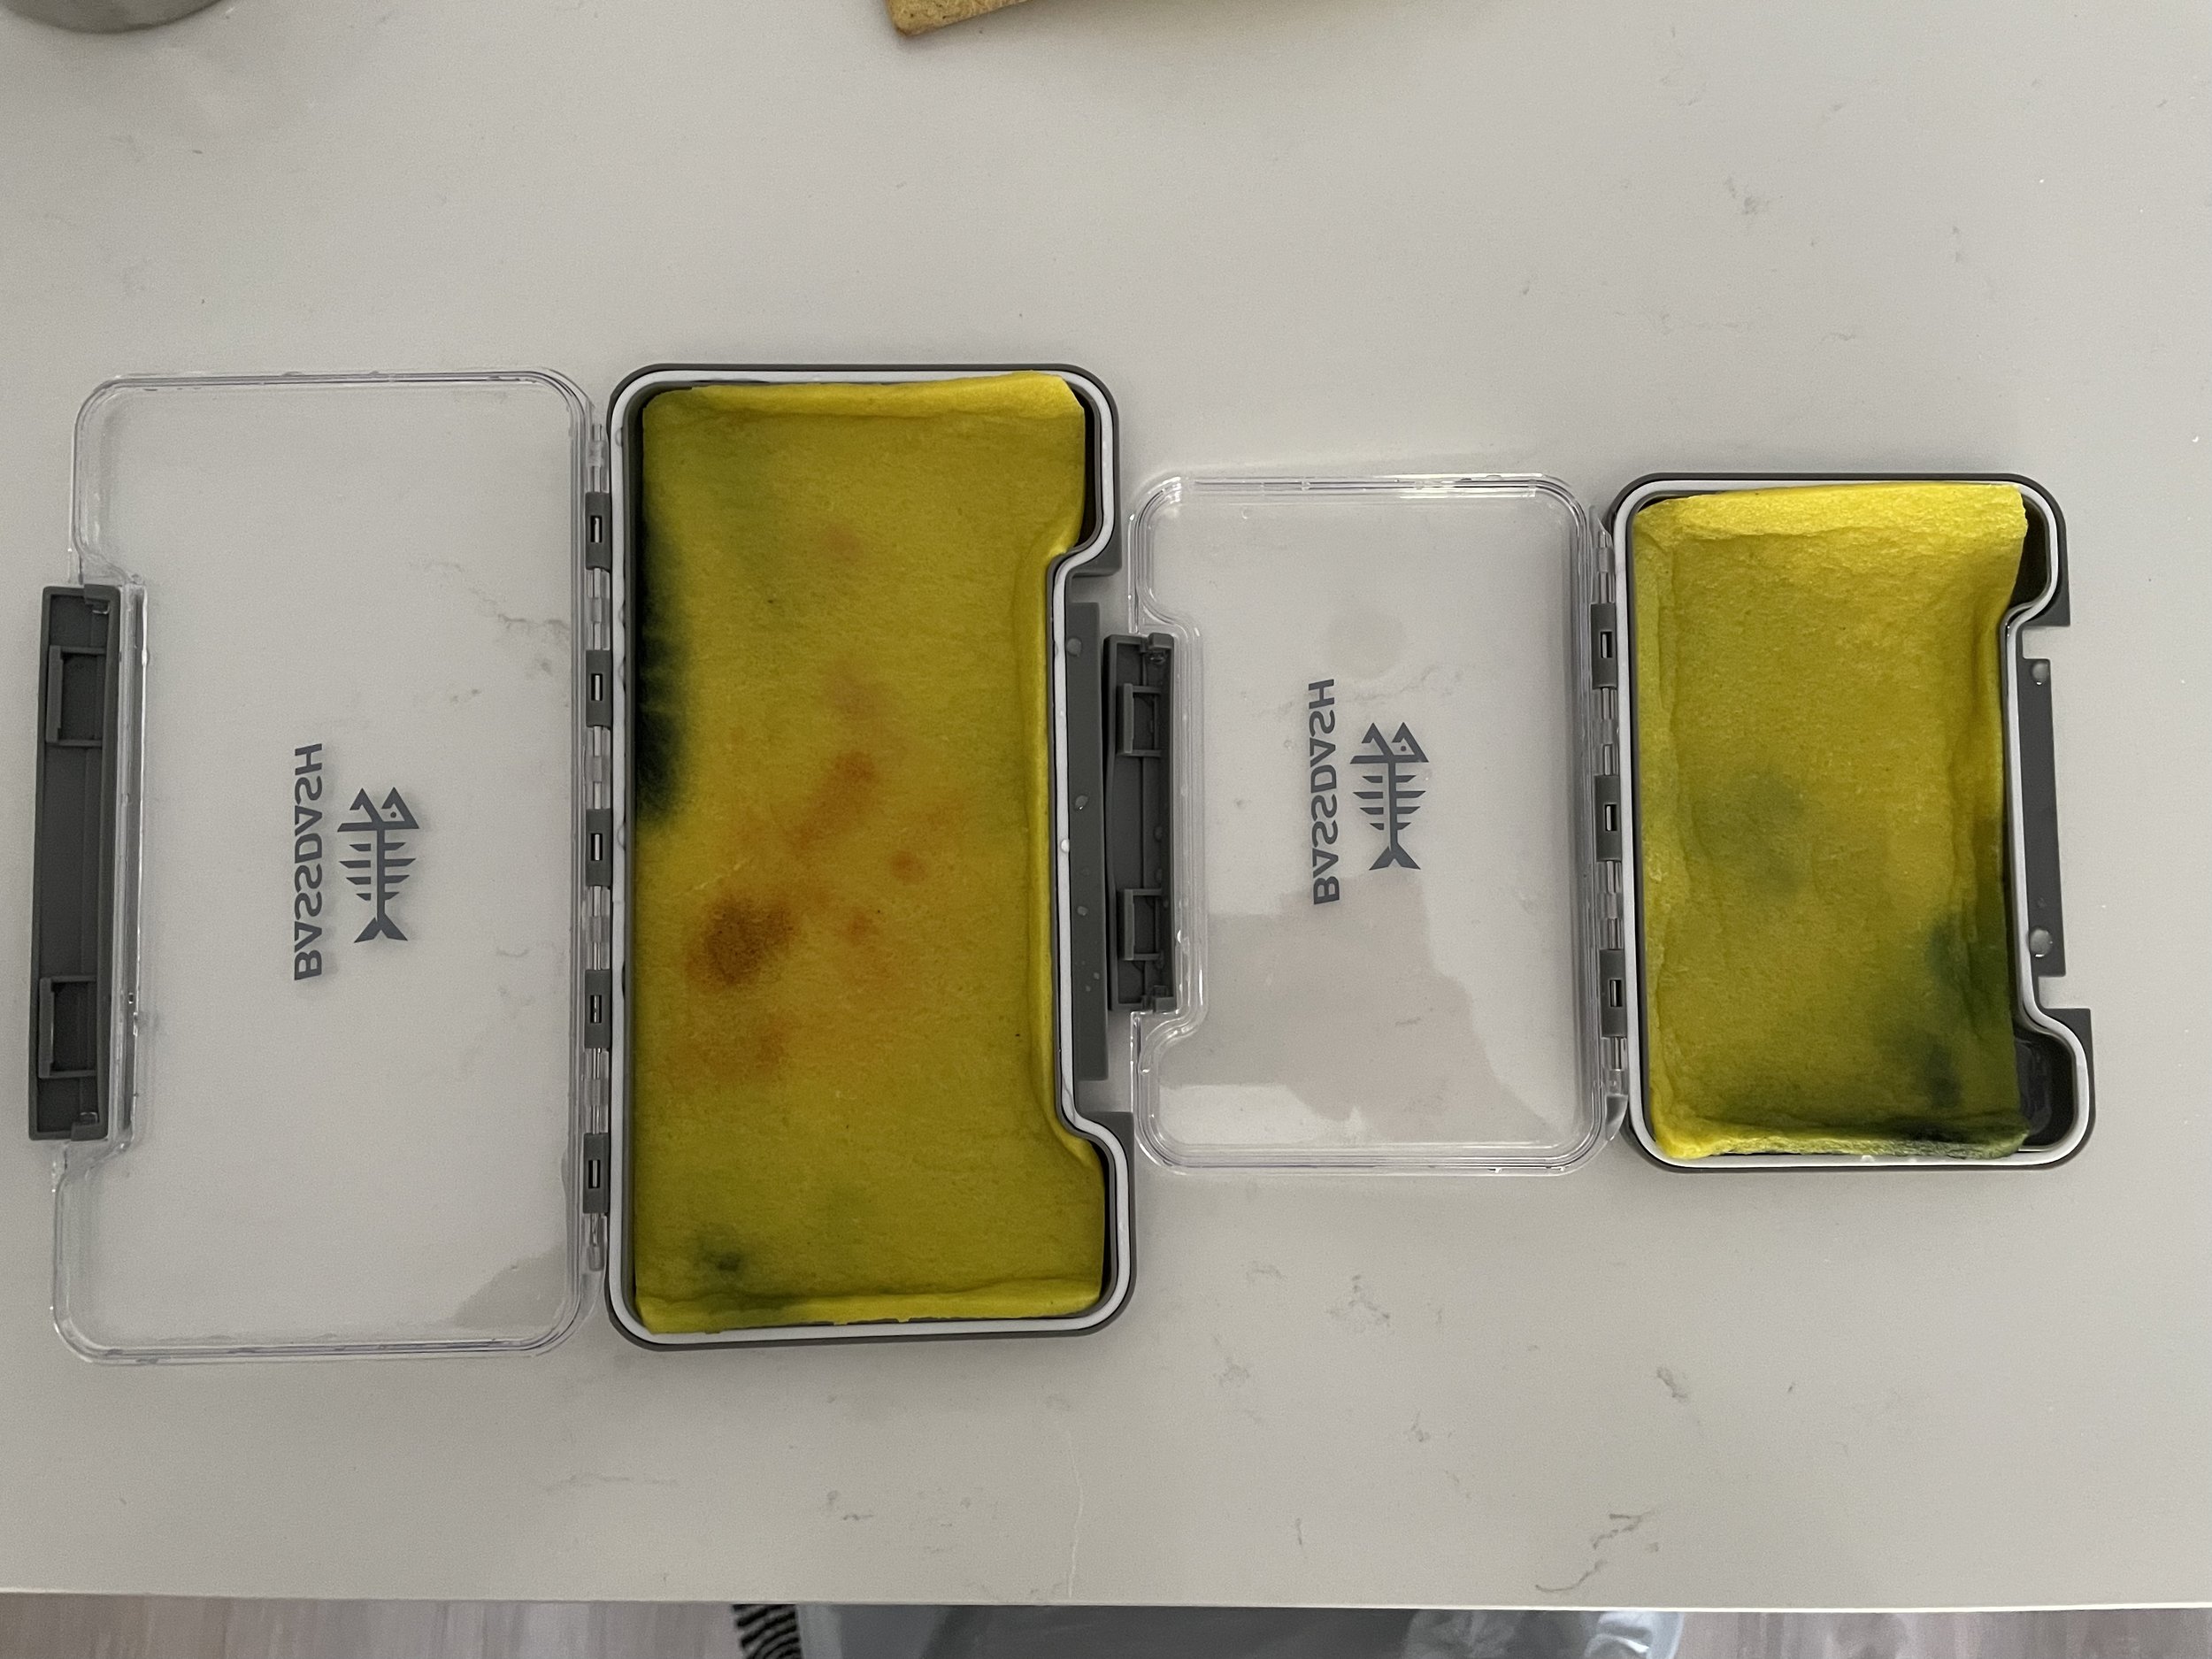
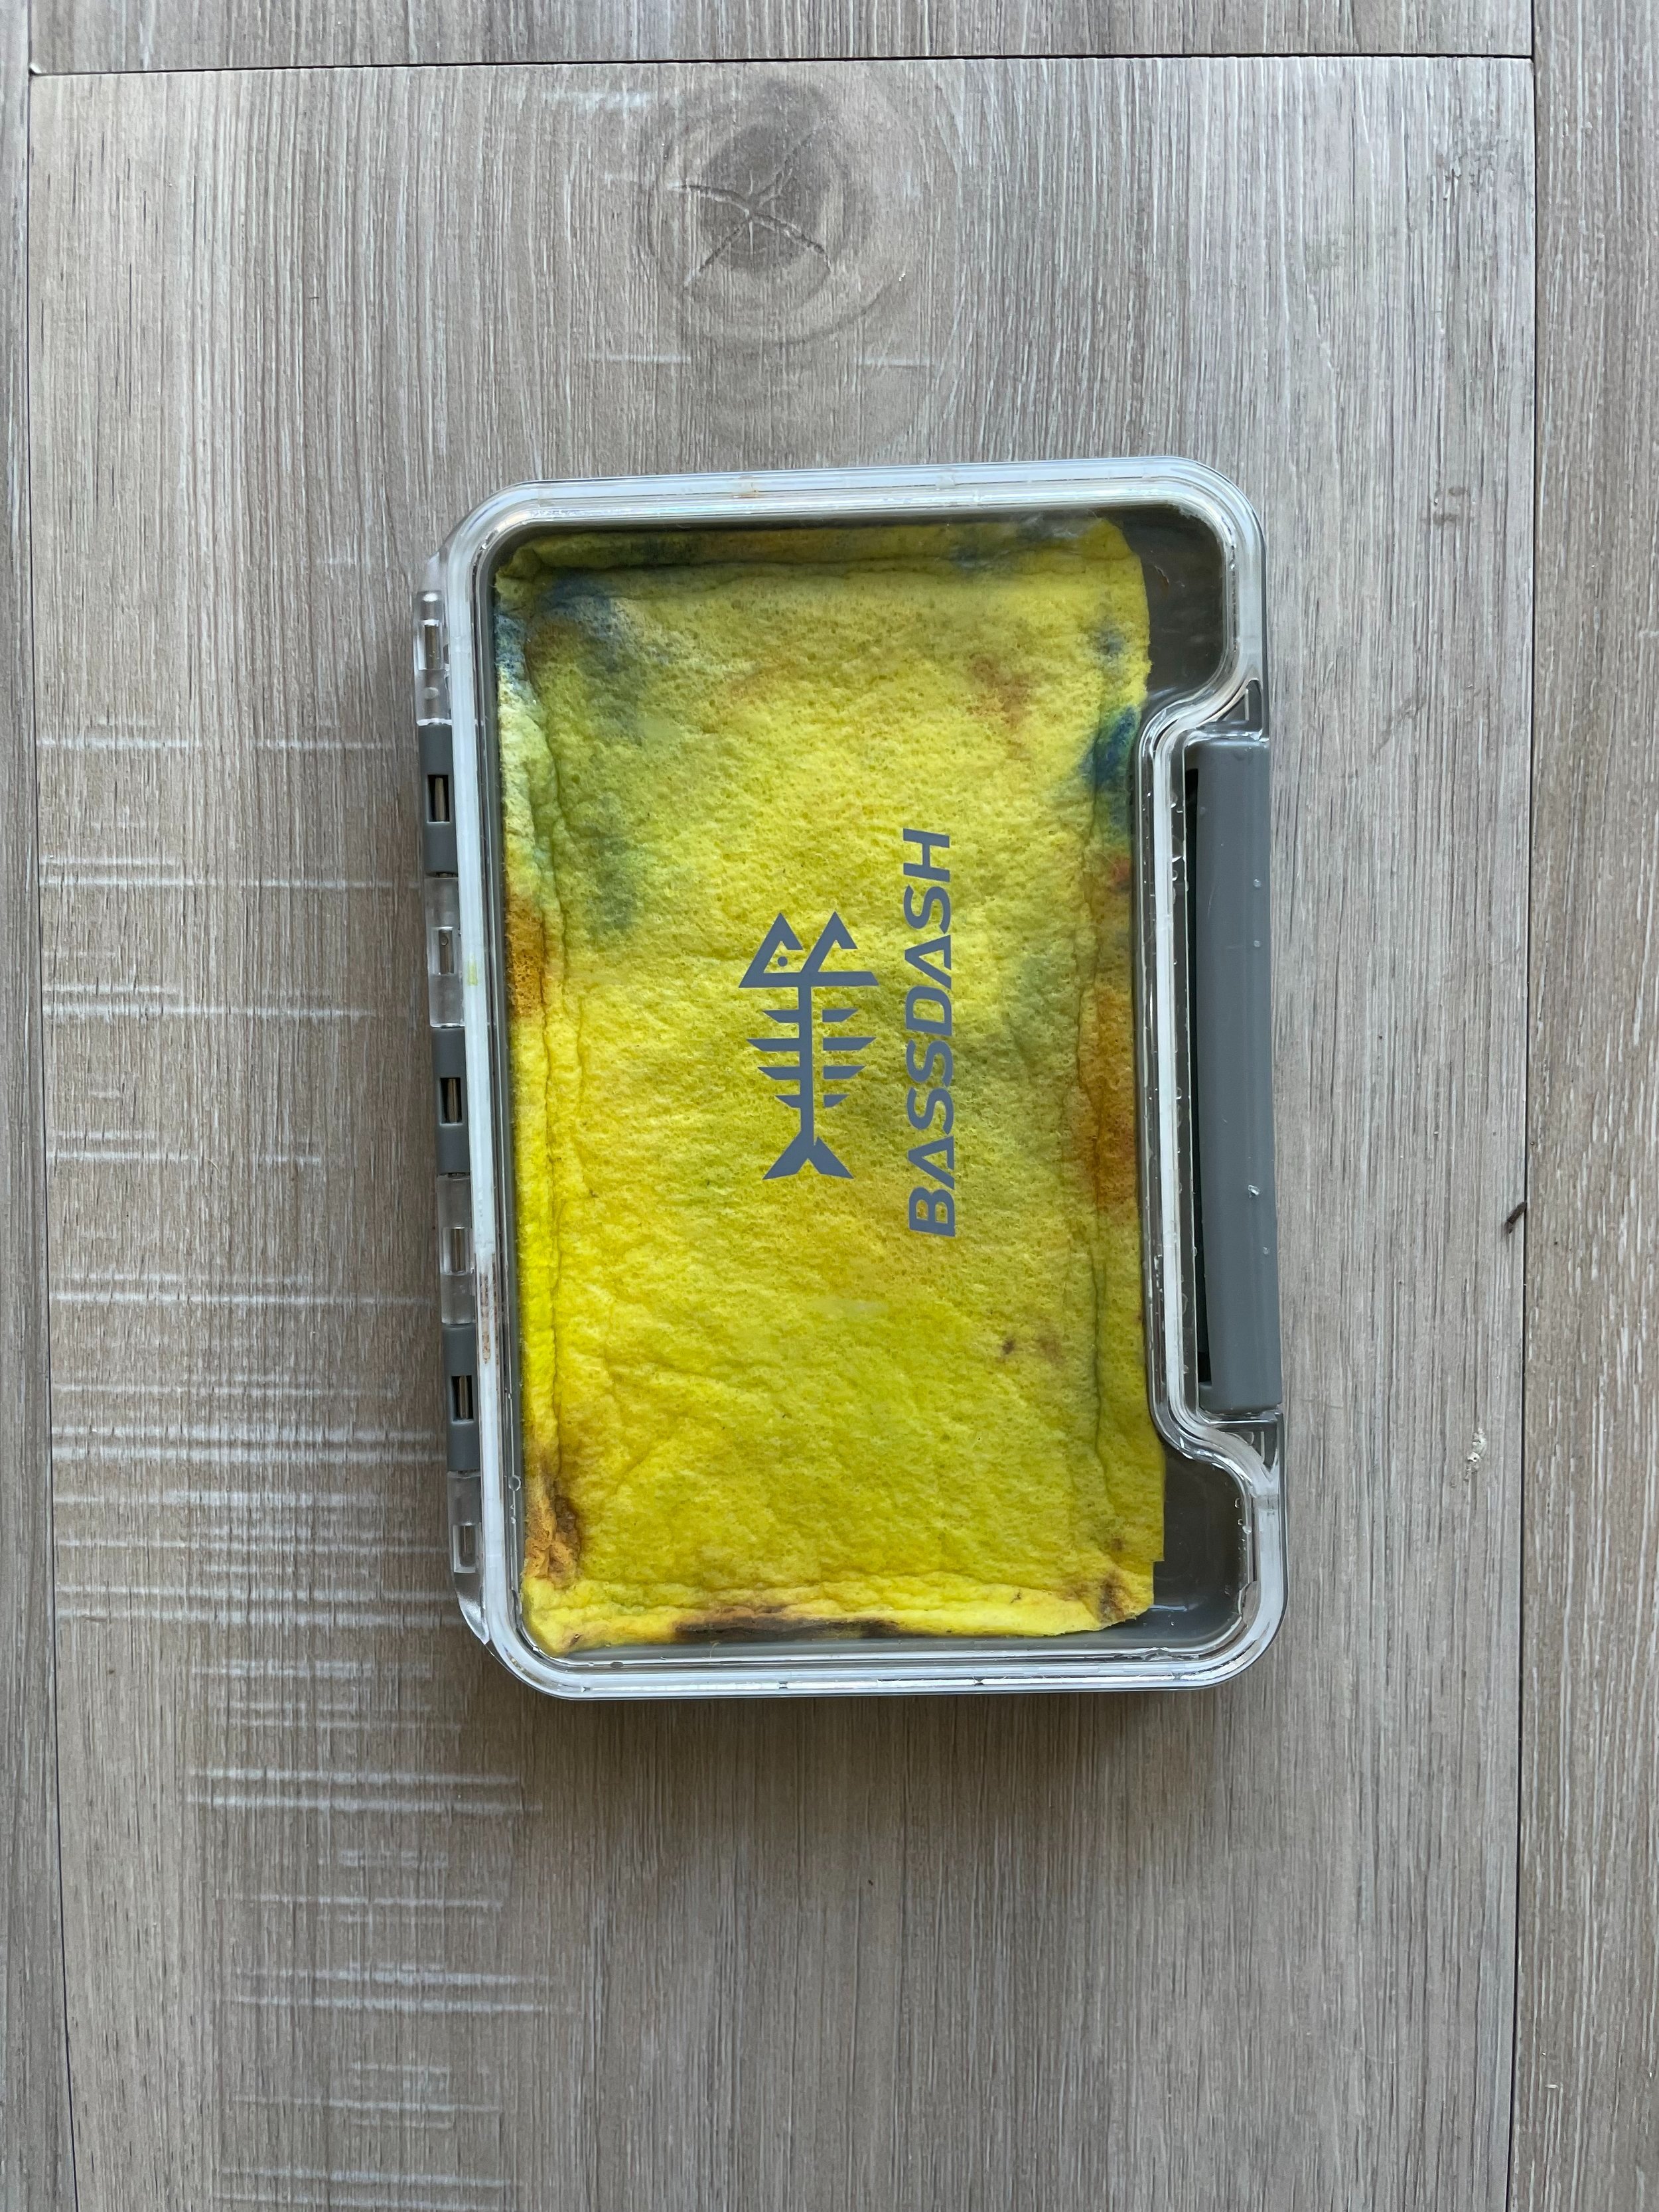
What it typically looks like after a few uses. I’ll wipe the lid when I get home and leave any paint on the palette side for next time.
Water
The water jar I’m using is plastic latching lid jar (from Big Rainforest Company) that I chose simply for being lightweight and totally sealed. Again, I hate when a crummy seal leaks and gets paint water all over the inside of my backpack.
To keep it secure while I work I used packing tape to secure a strong rare earth magnet to the bottom with a matching recessed magnet glued into the corner of my board.


Brushes
I’m no plein air master so I go with a very simple selection of brushes. A large flat for washing in big areas, two angled shaders, one large and one small for the bulk of the painting, as well as two round brushes, one large and one small. Pictured here is also the chalk pencil I sometimes use for lay-ins when needed.
These are all contained in a simple brush roll I made from a few a few rectangles of fabric with slots to hold the brushes in place. It rolls up nice and compact, the fabric cushions the brush bristles from being bent out of shape and also absorbs any extra water left on the brushes after I’m done.
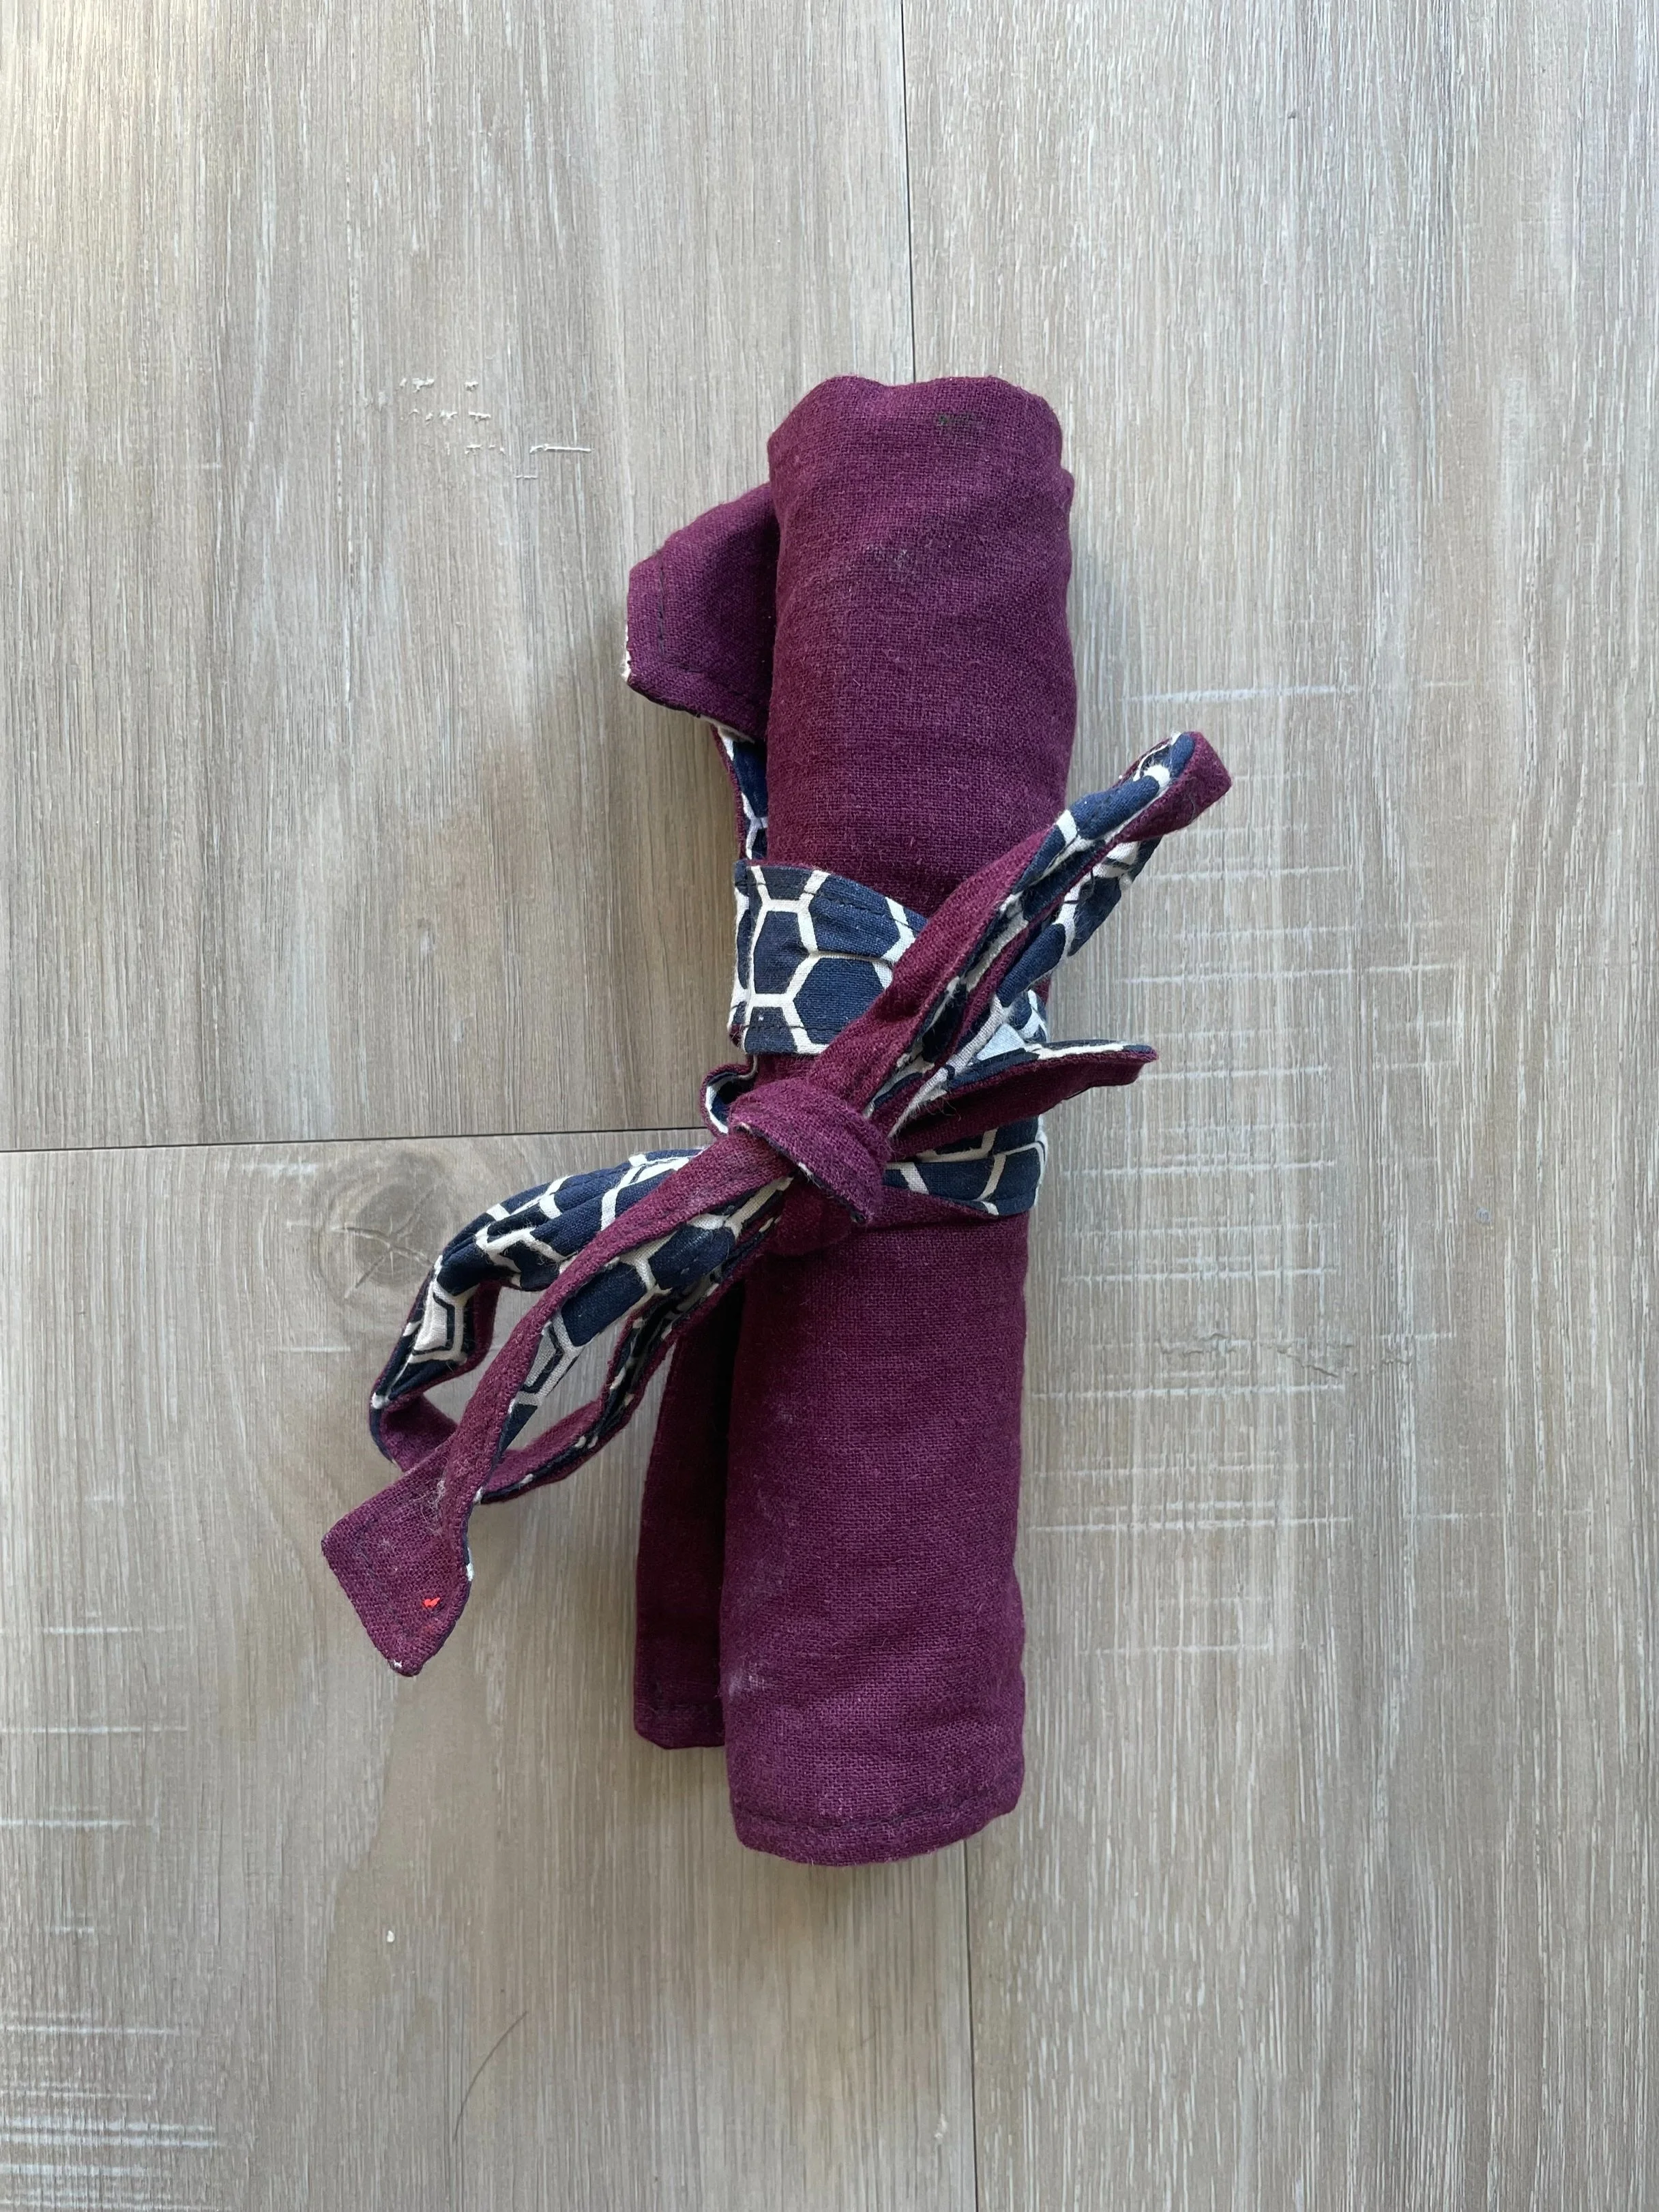
Rolled up

Open
Board
This is simply a super cheap canvas board, the same kind I used for practice oil paintings while in school. I’ve taped a few cut illustration board scraps to the bottom edge to act as a shelf and keep things from rolling off when I’m working, as well as added the magnet in the corner for the water pot.
The best part is that it’s exactly the perfect size to slide into the back of my backpack!
When I set up to paint this board goes across my lap and holds the water in the top left corner, my rag on the right (held by a few clips), and the palette and sketchbook in the middle.

The miscellaneous:
Chair -
For sitting on. This is a cheap 3 legged folding stool I bought from the Big Rainforest Company. At the time I also bought a second even smaller chair to use as a table but in the end I ditched it in favor of keeping everything on my lap.
Blue Tape -
Often I like to make my edges for a cleaner finished look. Also useful in a pinch if it gets really windy and you need to tape your pages down.
Spray Bottle -
For keeping the paints on the palette wet, although I rarely find myself using this these days unless it’s very hot or windy. The wet palette takes care of most of it.
Packing it all up
To keep everything as level and compact as possible here is the packing order I use. This takes up the bottom half of of the pack, leaving plenty of room for whatever else I need to bring on the hike, whether its shoes, extra jacket, snacks or lunch.

Layer 1:
palette, water jar, spray bottle and tape.

Layer 2:
Paint tubes (rag and clips are in the bag) and brush roll.

Layer 3
Sketchbook flat on top and the board slides flush against the back of the backpack.

Chair
The chair attaches to the side of the pack using the buckle strap meant to hold hiking pole.
Hope this helps inspire your own setups, happy painting!!


